Generate Detailed Reports Tailored to Your Needs
The Advanced Entry portal allows users to create personalized reports that offer valuable insights into different aspects of their data. Whether it's registries, entries, feedback, or reviews, the process of creating reports is straightforward and fully customizable. This comprehensive guide will take you through the step-by-step process of creating your own custom reports.
- Access the Advanced Entry Portal and Log In To initiate the process, navigate to portal.advancedentry.com and log in using your credentials.
- Navigate to the Reports Tab
Once logged in, locate and click on the "Reports" tab within the portal's interface. This will lead you to the report management section.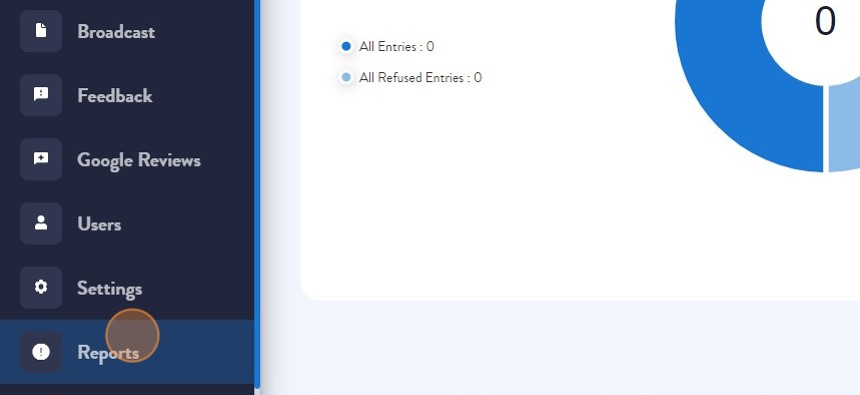
- Initiate a New Report
To create a new report, simply click on the "New report" button. - Name Your New Report
Begin by assigning a descriptive name to your report. This name will help you easily identify the report in the future. - Select the Report Content
Choose the type of content you wish to include in your report. Options include registries, entries, feedback, and reviews.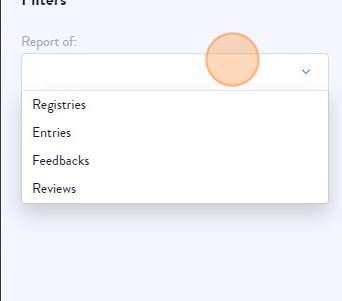
- Choose Visitor Types
You have the flexibility to select the specific visitor types for which should be included the report. Whether you're interested in all visitor types or a specific subset, this choice enables you to narrow down your report's scope. -
Set Report Frequency
Determine how often you want to receive the report by selecting from options such as daily, weekly, monthly, quarterly, or annually.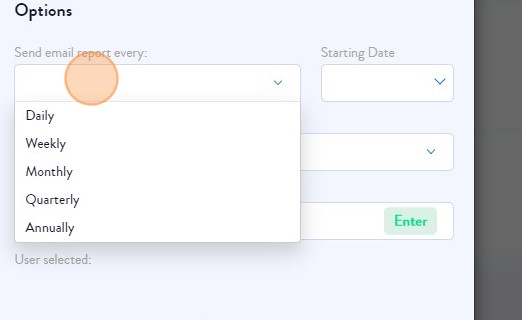
- Select a Start date
Choose the desired start date for generating this report. -
Specify Report Delivery Time
Select the time of day you prefer to receive the report This feature lets you schedule the report delivery for optimal convenience.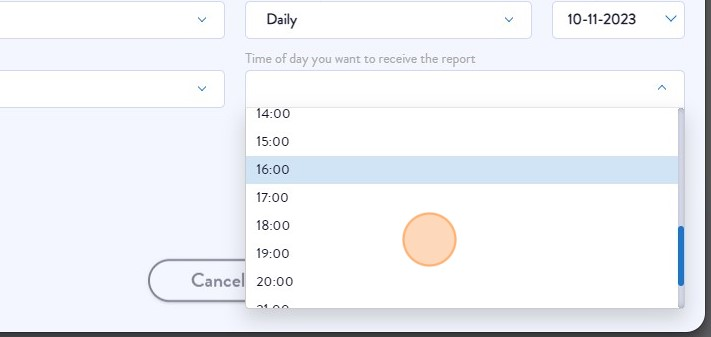
-
Add Recipient Email Addresses
In the field designated for recipients, input the email addresses of individuals who should receive the report. Remember to press "Enter" after each email address to separate multiple recipients.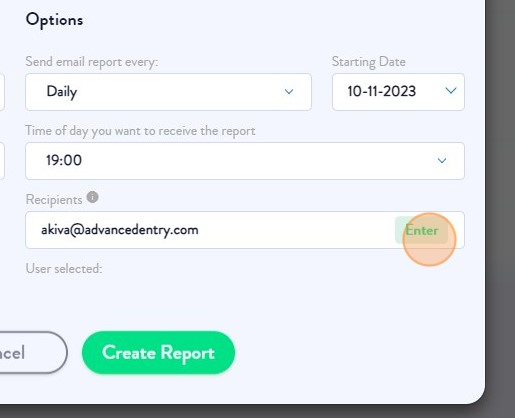
-
Finalize and Creating the Report
Once you have configured all the settings to your satisfaction, click on the "Create Report" button. This action will initiate the generation of your custom report based on the specified parameters.
Conclusion
Harnessing the power of data-driven insights has never been more accessible. By following the straightforward steps outlined in this guide, users of the Advanced Entry portal can create custom reports tailored to their specific needs. Whether you're interested in monitoring registries, entries, feedback, or reviews, this feature empowers you to make informed decisions based on real-time data.
Begin the journey towards enhanced decision-making with custom reports in the Advanced Entry portal today.